|
This
tutorial will show you how to take any image or graphic and make it
animated while leaving the image or graphic basically the same, as the
original.
Rules
on
the use of this graphic, are as follows: This graphic is only for
use with this tutorial, and may not be used for any other reason, with
out the permission of the creator, Janet Barnett. Please do not
remove the name on the graphic, for any reason. Janet was
kind enough to let me use this photo for this tutorial only.
After you have learned this technique, you
will be able to do this with any graphic and will not need to use this
graphic again.
This tutorial is done with PI
6.
Level: Intermediate +
Main
Tools used: Lasso Tool, Retouch-Blur Tool, Clone-Paintbrush, and Zoom
Tool.
|
|
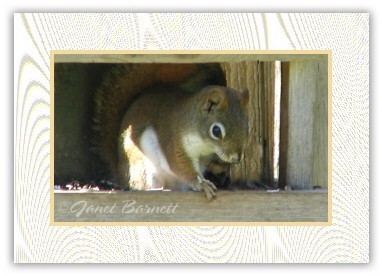
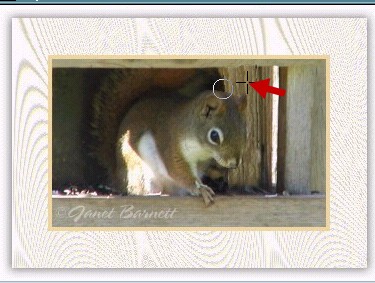
Here
is the picture, that we will be working with. Right click on
it and choose Save As and save the picture to your hard
drive.
I have the permission of the lady
who has taken the photo, but you cannot remove her name from the
picture.
If
you would like to use another image, then that is fine,
too.
Open your image in PI 6, and key in Ctrl + D to duplicate
the image. Minimize the original, we will work with the
duplicate. |
|
|
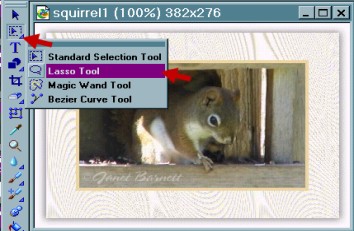
Go to side tool bar and click on
Standard Selection tool in drop down menu, click on Lasso
Tool. |
|
|
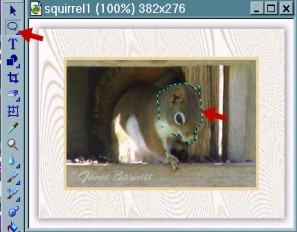
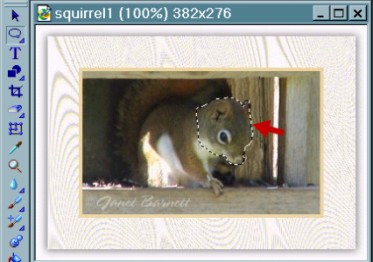
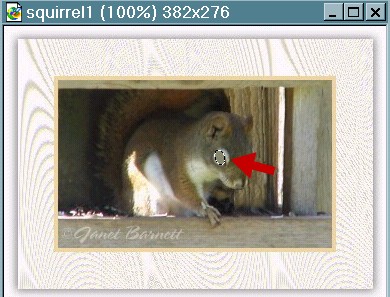
Draw around head, with the tool,
dont worry too much about going out of line a little, it will not
hurt. |
|
|
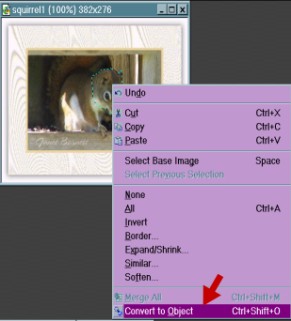
Right click and go to Convert to
Object. |
|
|
Now your green and maroon colored
line is white and black.
Note: leave head right where it is do not move,
yet. |
|
|
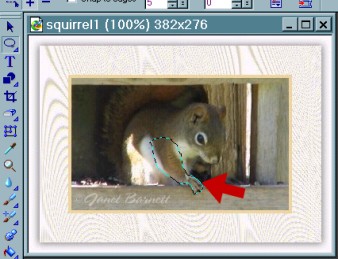
Do the same with the
arm.
Note: again do not move arm at this
time. |
|
|
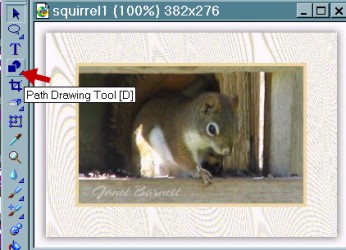
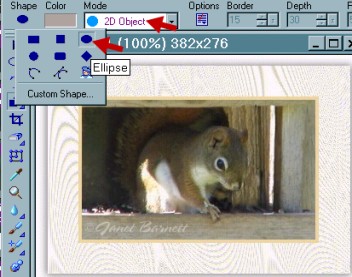
Ok now we will give him an eyelid,
to open and close.
Go
to Path Drawing Tool and click on it. |
|
|
Choose Ellipse, or oval shape,
Mode: 2D
For
the color use the eyedropper, to choose a color from the image that
you are animating, not too dark in this case, but not too light
either. |
|
|
Draw the shape and put it in the
eye area. Resize it if needed to fit fairly
well.
Now you should have all your body
parts that you need. |
|
|
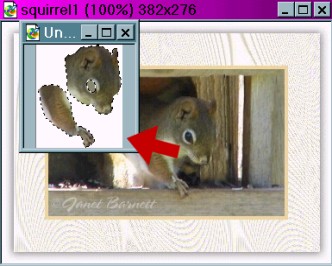
Now click on the head, arm
and eye to activate (hold down on shift key as you do this in
order to select all the parts at the same time) and right
click.....in drop down menu choose group. We are
grouping them in order to keep the parts in the exact
position that they are in as the original. Drag the
parts off onto their own canvas. Set them aside for
now. |
|
|
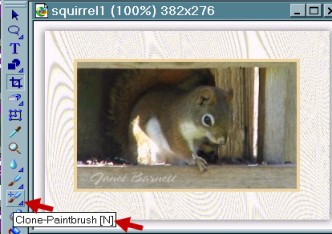
Ok now we are going to change the
duplicate of the original so it will look the same in each frame as
we move the parts around.
Go
to your Clone-paintbrush tool and click on it. |
|
|
Ok now behind some of the head, is
a wood post, so we want to clone that on to the part of the head
that is directly in front of the post. Dont need to worry about the
rest of the head, at this
time. |
Copyright ©
2002
Linda
J
|