|
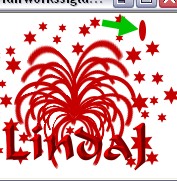
:: Fire Works
Sig Tag ::

PI Version: 8 (also suitable for version
7)
Level:
Intermediate, (should have knowledge of PI tools and
Animation)
Tools: Path Drawing
tool, Transform tool, Eraser tool.
Now some of you that
have a nice steady hand could do this by using the Paint brush
Tool and the Mode
button. I also know that someone might have an easier way of
doing
this, but Im not good
at drawing with the mouse, so this is how I did it. lol
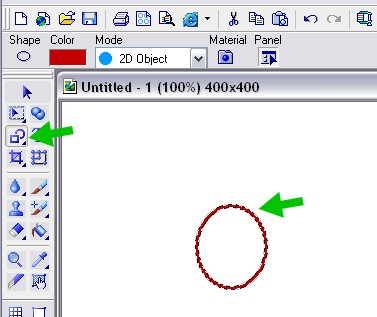 |
Click on your Outline Drawing
tool.
Set mode at 2D. Use any
color you would like, you can always change it.
Shape Oval. And border
should be no more then 3 or 4.
Draw your
oval. |
|
|
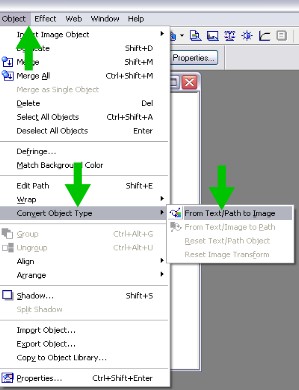
Then go to Object
convert object to type from text to path
image. |
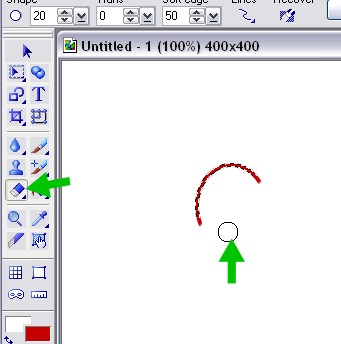 |
Now erase part of your
oval like picture here. You can do this anyway you choose,
but you want it to have
some of the upper curve.
|
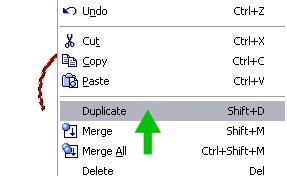 |
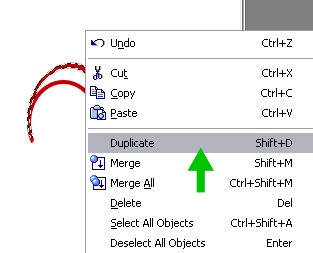
Now right click and
Duplicate
this. |
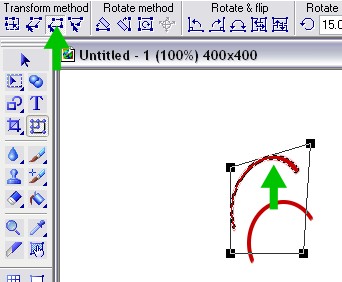 |
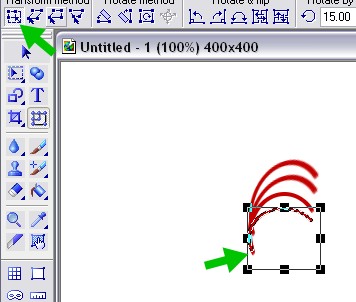
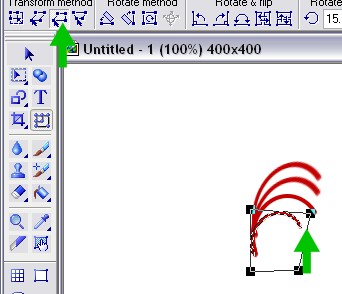
Move the duplicated
curve above the original curve.
Now here you want to
change the shape of the curve a little. Use the
Transform tool/Slant to
do this. |
|
|
Now Duplicate this
curve. Continue these steps until you have as many of these
have curves, as you
wish for one side of your flair.
Some of them you will
want to make smaller, and/or change the shape of the curve.
|
|
|
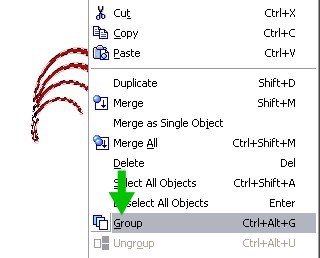
Now right click and
select all objects and right click again
and click on Group. Then right
click and duplicate.
Edit/Rotate
Flip/Horizontally. |
|
|
Now put the duplicate
on right side so it looks something like
this.
Then again, right click
select all objects, and then right again and group.
Then duplicate this.
About 3
times. |
|
|
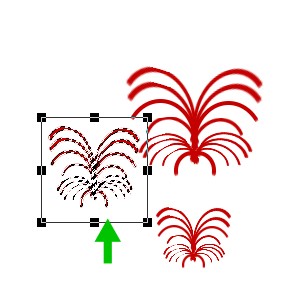
Now you want to resize
the 2 duplicates, so you have something like
this. |
 |
Now click on one of the
objects to activate it. and click on center to center on
canvas.Then activate the other
one and center it, and then the next, until you
have something
like this. Then do another Select all objects and
group. |
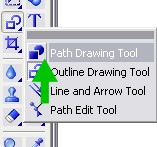 |
Now you want to make
the stars.
Go to Path Drawing
Tool/Shape/Custom Shape and select the
star. |
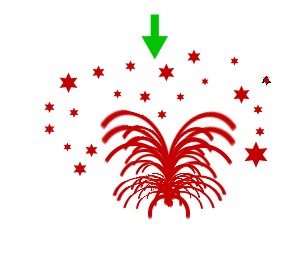 |
Now draw you stars,
remembering to make them all different sizes.
Make quite a few,
although you might not use them all but it is
better to be safe then
sorry. Lol
Now select the stars
and try to move them closer to your flair
object. Then select all
the stars and group
them. |
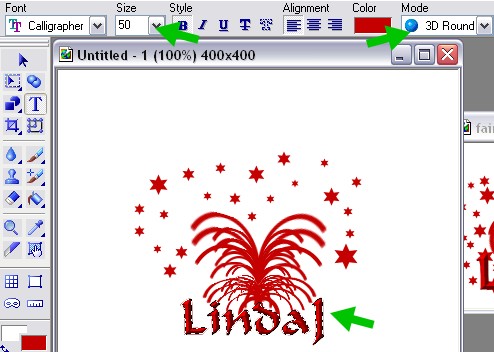 |
Now go to your Text and
change size to about 50, Mode 3D.
Although you can make
the size any that you wish. Add your
text.
Now select all objects,
and go to Edit/Crop, to make you canvas
smaller to fit you
objects. |
  |
Now
you want to make the little bullet like the
thing
that
flies in the sky to make the firework
display.
Just
use your Path Drawing Tool and make a very
small narrow bullet (with the elipse
shape) and rotate
about 25 degrees. Move your
bullet to the right
bottom corner of your
canvas. |
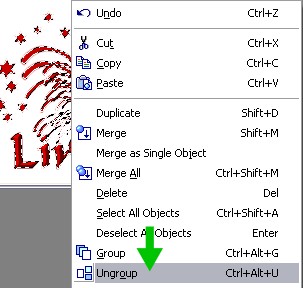 |
Now keep all object
activated, right click, and click on ungroup,
and do this as many
times as you need so when you do this the
ungroup is grayed out.
Then while all objects are still activated,
go to File/Save As
and save as UFO
format. |
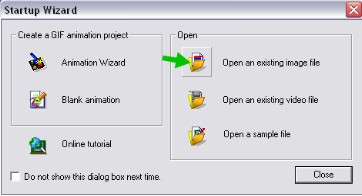 |
1)
Now open your animator,
and click on Open an existing image
file. |
 |
2)
Find your ufo file, and
click on
it. |
 |
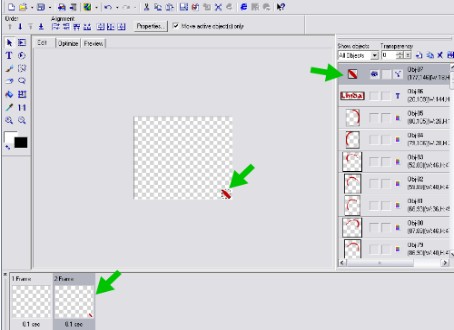
3)
Now you will see this
on your screen, looks confusing doesnt it.
Lol
On your right are
your objects all in a row. First we want to turn
them all off (so to
speak) so click on the first one to highlight it
and then scroll down to
the bottom of the list and click on Shift
key/and click on the
last object in the list, and they will all
highlight,
and click on the eye in
one, and it will shut them all off. Now
always
leave the white
background off, so your finished animation will be
transparent bg. Leave
your first frame as a blank transparent bg,
and duplicate the
frame. Now this will get a little
tricky. |
 |
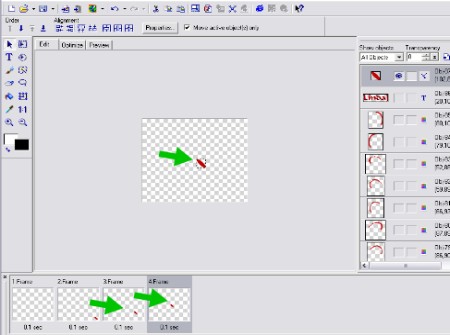
4)
Now go to your bullet,
object and click first on the box to high light it, and not the rest
of your objects. Then click on the eye so you can see your bullet in
your second frame.
Like in the example to
the left.
You want to duplicate
this frame 2 more
times. |
 |
5)
In the second frame
move your bullet up at an angle about half way to the center of your
frame, then in the 3rd frame move your bullet, to the center, or
there about.
Like the picture on the
left. |
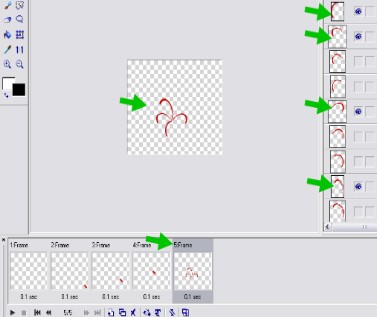 |
6)
Now duplicate this
frame again, and click off the eye on the bullet, and go to the row
of the smallest of your flairs.
(Note; they
are usually in order.)
Click on the eye on
just a few of them, about 4 or 5. Then duplicate this frame, and go
and click on the eye of a few more of your flairs, and duplicate
this and click on the rest of your flairs of this size. See
additional screenshots
below. |
 |
 |
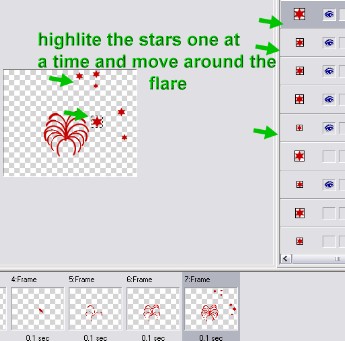 |
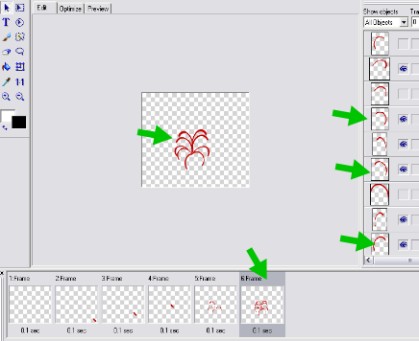
7)
Now duplicate last
frame again, in this last frame of this
first size
flares, and then add some stars. Not all of
the stars- just a few
of them. If you need to move them
around a little then
click on the row where your image is,
in the list, and it
will highlight (the one in the picture
is a darker gray then the others that means it is
selected)
Move the stars around
your flairs. Remember to vary the
size of stars you
use. |
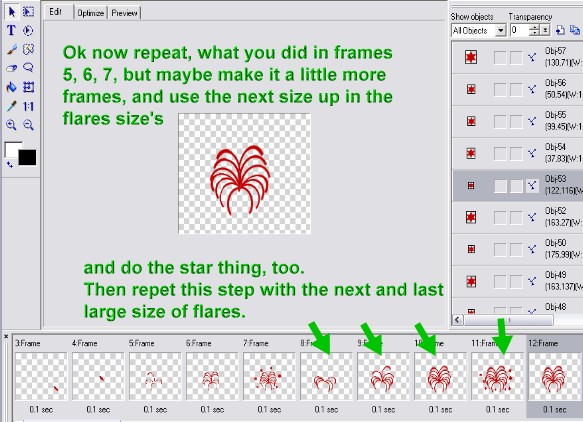 |
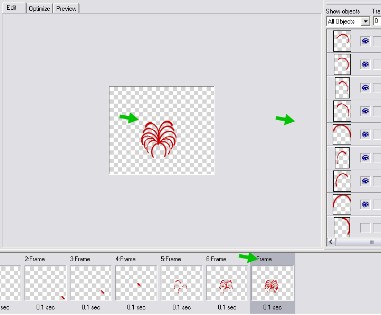
8)
Ok now you want to
repeat steps 6 and 7, except now
use the next size
bigger in your flairs. And after that
you would do the steps
6 and 7 again with the larger
and last size of
flairs.
Dont forget your stars
too. |
 |
|
|
|
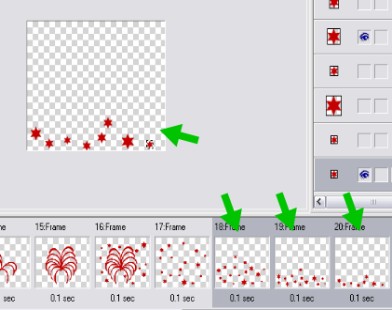
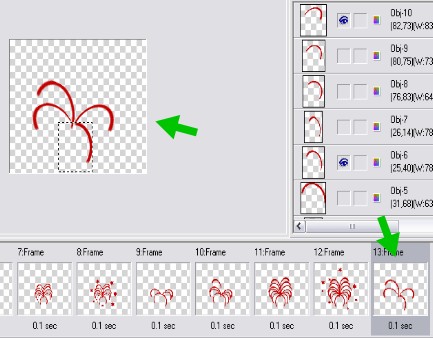
Now we want to start with a blank frame and
add a lot
of your stars,
spread out over the frame/canvas (go to
Frame/Add Frame). Then duplicate this frame
about
3 times, and move the stars down to the
bottom of
each frame, deleting the stars that are
already close
to the bottom.
|
|
|
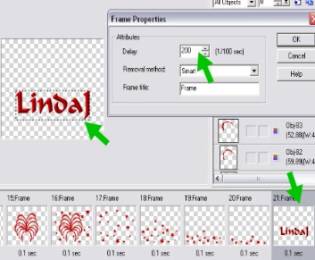
Now duplicate the last
frame, one more time, and remove
all stars, so you have
a blank frame, and click on your name
or what ever word you
have to add. Put it anywhere you
would like it to
appear.
Set the Delay time to
about
200. |
|
|
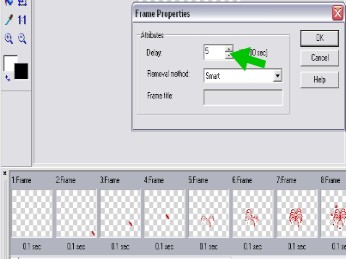
Now highlight all the
other frames and set the delay time
on these to about
5.
Note, you can change
the delay time to anything you want,
but the less delay time
on the flairs and stars will make it look
better.
That is it you are
done, now preview your animation to
make sure it looks the
way you want it
too. |
|
|
|
|
|
 |