Birdbox tutorial
By Linda Jacobs
Page 2
 Now
to make Lids.
Now
to make Lids.
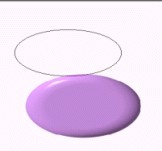
Go to Path Drawing Tool, Shape-Oval, Mode 3D, Border 15,
Depth 20. Draw shape on canvas.
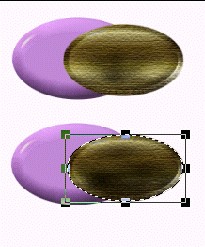 Put on
base a shape to fit, remember to use the Transform Tool for perspective. Like we
did on the base.
Put on
base a shape to fit, remember to use the Transform Tool for perspective. Like we
did on the base.
When you have it fit to base right click and duplicate it 2
twice. Take 1 off canvas, and bring back the 2 extra lining's. Put these over
the 2 lids that remain on the
canvas.
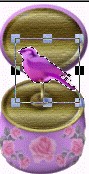
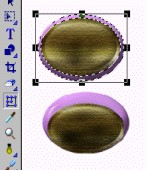 On the
first lid make the lining centered so you can see a little of the lid all the
way around it. With the second lid make the lining more off center like in
picture here. Use burn tool to darken lining is some place's to perception. Also
raise lid that is the open lid top a little to make look more open. Now select
each piece of the first lid and merge as single object. Do the same with the
second lid & lining. Take all lids off canvas.
On the
first lid make the lining centered so you can see a little of the lid all the
way around it. With the second lid make the lining more off center like in
picture here. Use burn tool to darken lining is some place's to perception. Also
raise lid that is the open lid top a little to make look more open. Now select
each piece of the first lid and merge as single object. Do the same with the
second lid & lining. Take all lids off canvas.
 Now to
make the bird stand.
Now to
make the bird stand.
Go back to Path Drawing Tool, Shape Oval, Mode 3D,
Border 15, Depth 30, Draw a small oval.

 Then go to shape and change to rectangle and draw a small thin
rectangle and duplicate it and resize it to be smaller then the first one, then
rotate flip 90 degrees. Put first bar on little oval, and second bar across the
first. Now select all these and merge as a single object, then duplicate this
one, and make this second one about half the size of the first.
Then go to shape and change to rectangle and draw a small thin
rectangle and duplicate it and resize it to be smaller then the first one, then
rotate flip 90 degrees. Put first bar on little oval, and second bar across the
first. Now select all these and merge as a single object, then duplicate this
one, and make this second one about half the size of the first.
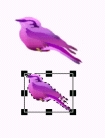 Now
pick your bird and duplicate it and make one smaller then the other. Take off
the canvas.
Now
pick your bird and duplicate it and make one smaller then the other. Take off
the canvas.
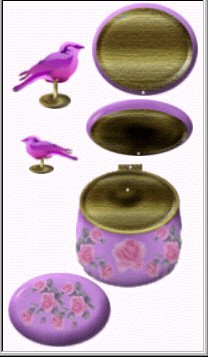 By now
you should find that these are all the pieces you have made.
By now
you should find that these are all the pieces you have made.
Now put the bigger stand onto the base
and also put the open
lid on base and the bird to be sure that you are happy with the size. Select all
object and move off canvas. The new canvas this creates will be exactly the
right size for the frames that we're needing to create so you can close the old
canvas.
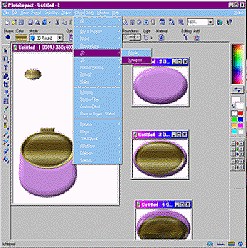
 Now go
to the layer manager and lock down base only. Remove all parts other than the
base and go get closed lid and place it on base. Deselect lid and go to image
optmizer and save as a .gif file first-frame and also as last frame.
Now go
to the layer manager and lock down base only. Remove all parts other than the
base and go get closed lid and place it on base. Deselect lid and go to image
optmizer and save as a .gif file first-frame and also as last frame.
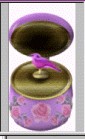 Now
remove this lid and put on second lid, and smaller bird and stand. Then optmize
and save as a .gif file for frame-1.
Now
remove this lid and put on second lid, and smaller bird and stand. Then optmize
and save as a .gif file for frame-1.
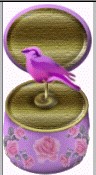
 Put
full open lid and larger bird and stand. Go to layer manager and lock all down
except bird. Deselect bird, optimize and save as a .gif file for frame-2.
Put
full open lid and larger bird and stand. Go to layer manager and lock all down
except bird. Deselect bird, optimize and save as a .gif file for frame-2.
Now select bird again and go to transform tool and set the toation limit to about 10 or 15 degrees. Rotate the bird for the first time then deselect bird and optimize and save a .gif file for frame-3. Repeat this step again about 2 times more being sure to optimize and save as the next frame number each time. After doing this go to edit, rotate & flip and flip horizontally. Then again repeat this step in reverse order until the bird is back up in level postion, saving each move as another frame. When the bird is back level rotate & flip back horizontally again and optimize this last frame number and save as. Caution...when you move the bird each time be sure to check where the bird is because sometimes it will move off center and you don't want that to happen. Be sure to move the bird back to center before optimizing and saving if necessary!
Follow me to page 3 and I will show you how to make all these fames you've saved into one animated picture.